📢 声明:
转载,请先标注出处哦!编写不易,尊重一下劳动成果哦!
个人博客网站 ==》https://alicewanttobackuw.github.io/
github ==》https://github.com/AliceWantToBackUw
csdn ==》https://blog.csdn.net/lengyue29
2024-04-22 更新:添加了 3.2 目录下的删除操作文章的超链接
# Visual Studio Code 使用 CMake
# 1 前置条件
- 安装
CMake:通过cmake -version检查有无安装成功 - 安装
MinGW(目录 3.2 需要):参考文章 http://t.csdnimg.cn/9Jo5Z
# 2 创建一个简单项目
//-------head.h | |
#ifndef _HEAD_H | |
#define _HEAD_H | |
// 加法 | |
int add(int a, int b); | |
// 减法 | |
int subtract(int a, int b); | |
// 乘法 | |
int multiply(int a, int b); | |
// 除法 | |
double divide(int a, int b); | |
#endif | |
//-------add.cpp | |
#include <stdio.h> | |
#include "head.h" | |
int add(int a, int b) | |
{ | |
return a + b; | |
} | |
//-------div.cpp | |
#include <stdio.h> | |
#include "head.h" | |
double divide(int a, int b) | |
{ | |
return (double)a / b; | |
} | |
//-------mul.cpp | |
#include <stdio.h> | |
#include "head.h" | |
int multiply(int a, int b) | |
{ | |
return a * b; | |
} | |
//-------sub.cpp | |
#include <stdio.h> | |
#include "head.h" | |
// 减法 | |
int subtract(int a, int b) | |
{ | |
return a - b; | |
} | |
//-------main.cpp | |
#include <stdio.h> | |
#include "head.h" | |
int main() | |
{ | |
int a = 20; | |
int b = 12; | |
printf("a = %d, b = %d\n", a, b); | |
printf("a + b = %d\n", add(a, b)); | |
printf("a - b = %d\n", subtract(a, b)); | |
printf("a * b = %d\n", multiply(a, b)); | |
printf("a / b = %f\n", divide(a, b)); | |
return 0; | |
} |
# 项目结构
03cmake | |
├─ .vscode | |
│ ├─ c_cpp_properties.json | |
│ └─ tasks.json | |
├─ add.cpp | |
├─ CMakeLists.txt | |
├─ div.cpp | |
├─ head.h | |
├─ main.cpp | |
├─ mult.cpp | |
└─ sub.cpp |
# 3 Windows 下生成可执行程序
# 3.1 通过生成 vs 项目,再由 vs 编译生成而得
参考文章:http://t.csdnimg.cn/zQP57
在 windows 环境下,在根目录使用下列命令,会默认生成 Visual Studio 项目工程文件
cmake . |
此时的项目结构变成了
03cmake | |
├─ .vscode | |
│ ├─ c_cpp_properties.json | |
│ └─ tasks.json | |
├─ 03make.vcxproj | |
├─ 03make.vcxproj.filters | |
├─ add.cpp | |
├─ ALL_BUILD.vcxproj | |
├─ ALL_BUILD.vcxproj.filters | |
├─ CMakeCache.txt | |
├─ CMakeFiles | |
│ ├─ 3.29.0-rc4 | |
│ │ ├─ CMakeCCompiler.cmake | |
│ │ ├─ CMakeCXXCompiler.cmake | |
│ │ ├─ CMakeDetermineCompilerABI_C.bin | |
│ │ ├─ CMakeDetermineCompilerABI_CXX.bin | |
│ │ ├─ CMakeRCCompiler.cmake | |
│ │ ├─ CMakeSystem.cmake | |
│ │ ├─ CompilerIdC | |
│ │ │ ├─ CMakeCCompilerId.c | |
│ │ │ ├─ CompilerIdC.exe | |
│ │ │ ├─ CompilerIdC.vcxproj | |
│ │ │ ├─ Debug | |
│ │ │ │ ├─ CMakeCCompilerId.obj | |
│ │ │ │ ├─ CompilerIdC.exe.recipe | |
│ │ │ │ └─ CompilerIdC.tlog | |
│ │ │ │ ├─ CL.command.1.tlog | |
│ │ │ │ ├─ CL.read.1.tlog | |
│ │ │ │ ├─ CL.write.1.tlog | |
│ │ │ │ ├─ CompilerIdC.lastbuildstate | |
│ │ │ │ ├─ link.command.1.tlog | |
│ │ │ │ ├─ link.read.1.tlog | |
│ │ │ │ └─ link.write.1.tlog | |
│ │ │ └─ tmp | |
│ │ ├─ CompilerIdCXX | |
│ │ │ ├─ CMakeCXXCompilerId.cpp | |
│ │ │ ├─ CompilerIdCXX.exe | |
│ │ │ ├─ CompilerIdCXX.vcxproj | |
│ │ │ ├─ Debug | |
│ │ │ │ ├─ CMakeCXXCompilerId.obj | |
│ │ │ │ ├─ CompilerIdCXX.exe.recipe | |
│ │ │ │ └─ CompilerIdCXX.tlog | |
│ │ │ │ ├─ CL.command.1.tlog | |
│ │ │ │ ├─ CL.read.1.tlog | |
│ │ │ │ ├─ CL.write.1.tlog | |
│ │ │ │ ├─ CompilerIdCXX.lastbuildstate | |
│ │ │ │ ├─ link.command.1.tlog | |
│ │ │ │ ├─ link.read.1.tlog | |
│ │ │ │ └─ link.write.1.tlog | |
│ │ │ └─ tmp | |
│ │ ├─ VCTargetsPath.txt | |
│ │ ├─ VCTargetsPath.vcxproj | |
│ │ └─ x64 | |
│ │ └─ Debug | |
│ │ ├─ VCTargetsPath.recipe | |
│ │ └─ VCTargetsPath.tlog | |
│ │ └─ VCTargetsPath.lastbuildstate | |
│ ├─ c1c397eb2ba1589aadad67e99cf541fa | |
│ │ └─ generate.stamp.rule | |
│ ├─ cmake.check_cache | |
│ ├─ CMakeConfigureLog.yaml | |
│ ├─ CMakeScratch | |
│ ├─ generate.stamp | |
│ ├─ generate.stamp.depend | |
│ ├─ generate.stamp.list | |
│ ├─ pkgRedirects | |
│ └─ TargetDirectories.txt | |
├─ CMakeLists.txt | |
├─ cmake_install.cmake | |
├─ demo.sln | |
├─ div.cpp | |
├─ head.h | |
├─ main.cpp | |
├─ mult.cpp | |
├─ README.md | |
├─ sub.cpp | |
├─ ZERO_CHECK.vcxproj | |
└─ ZERO_CHECK.vcxproj.filters |
你需要用 Visual Studio 来打开 .sln 项目文件,然后运行,才能够生成可执行程序。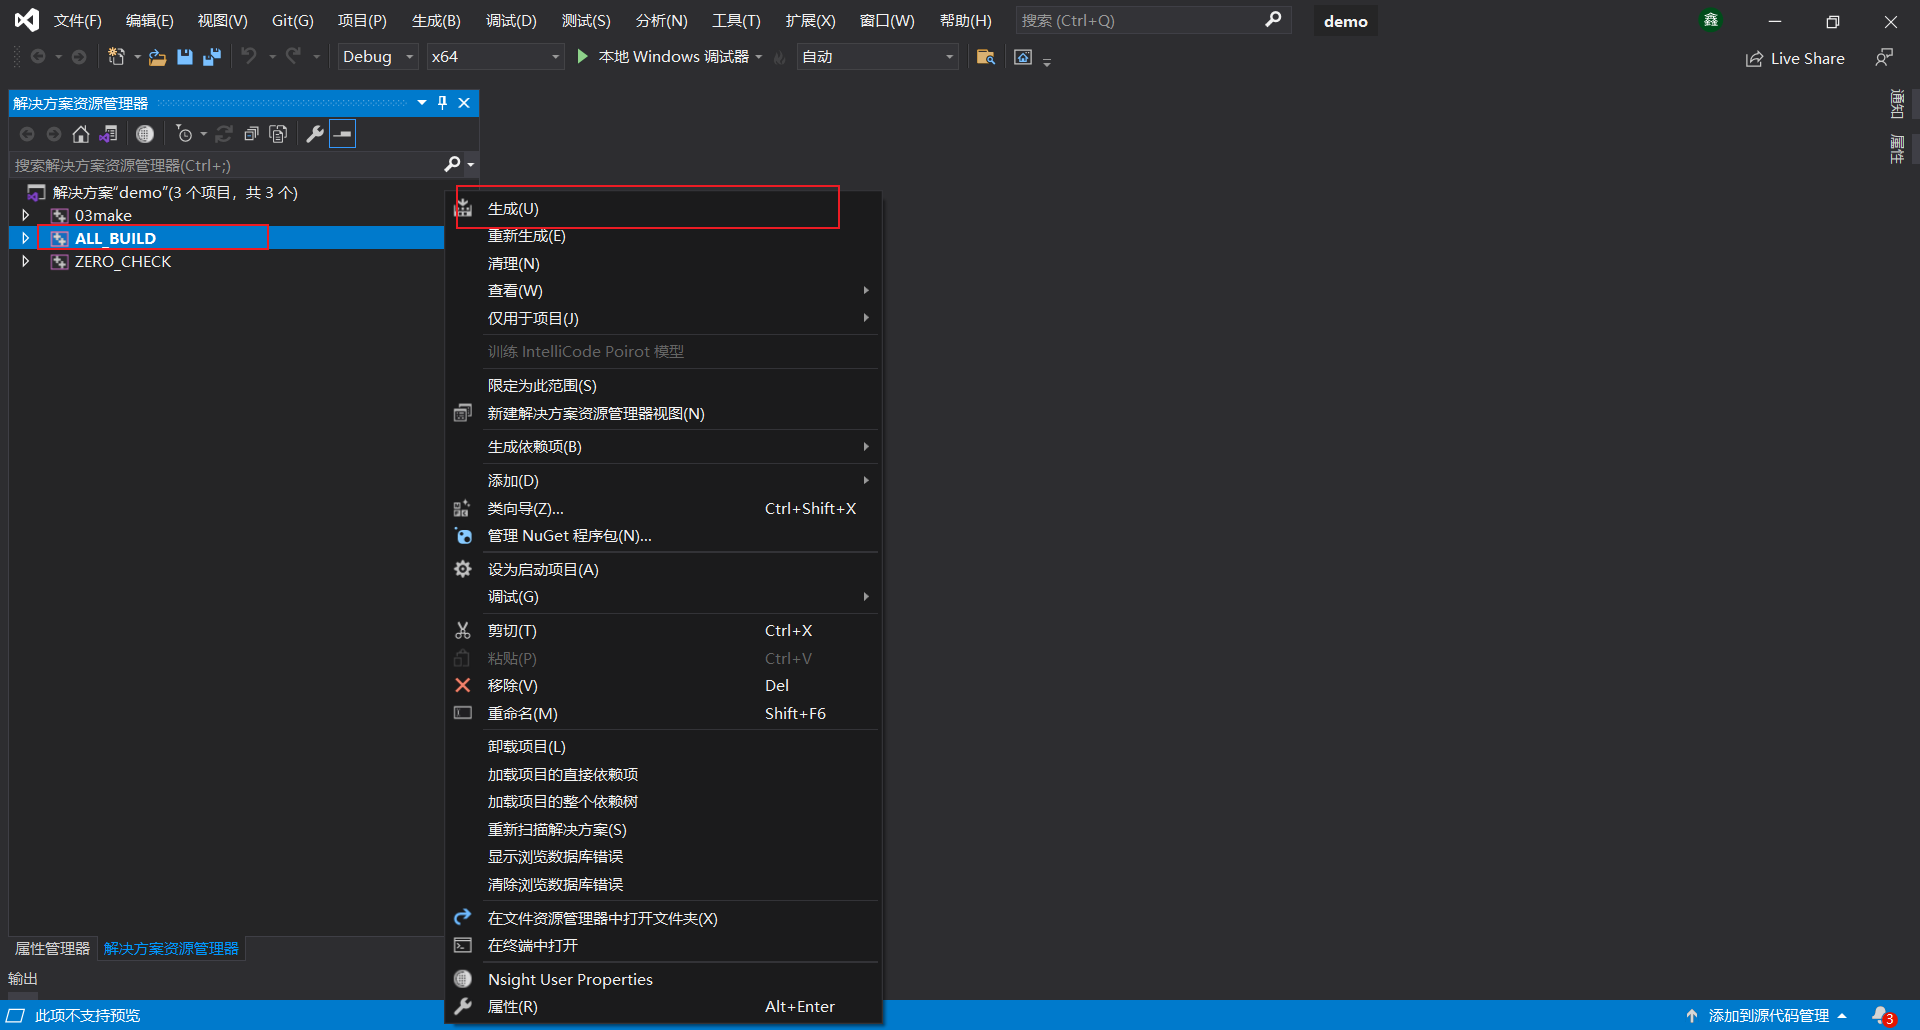
生成成功,你可在项目根路径查看到 debug 目录,其中有个 03make.exe (你自己在 CMakeLists.txt 设置名字)可执行程序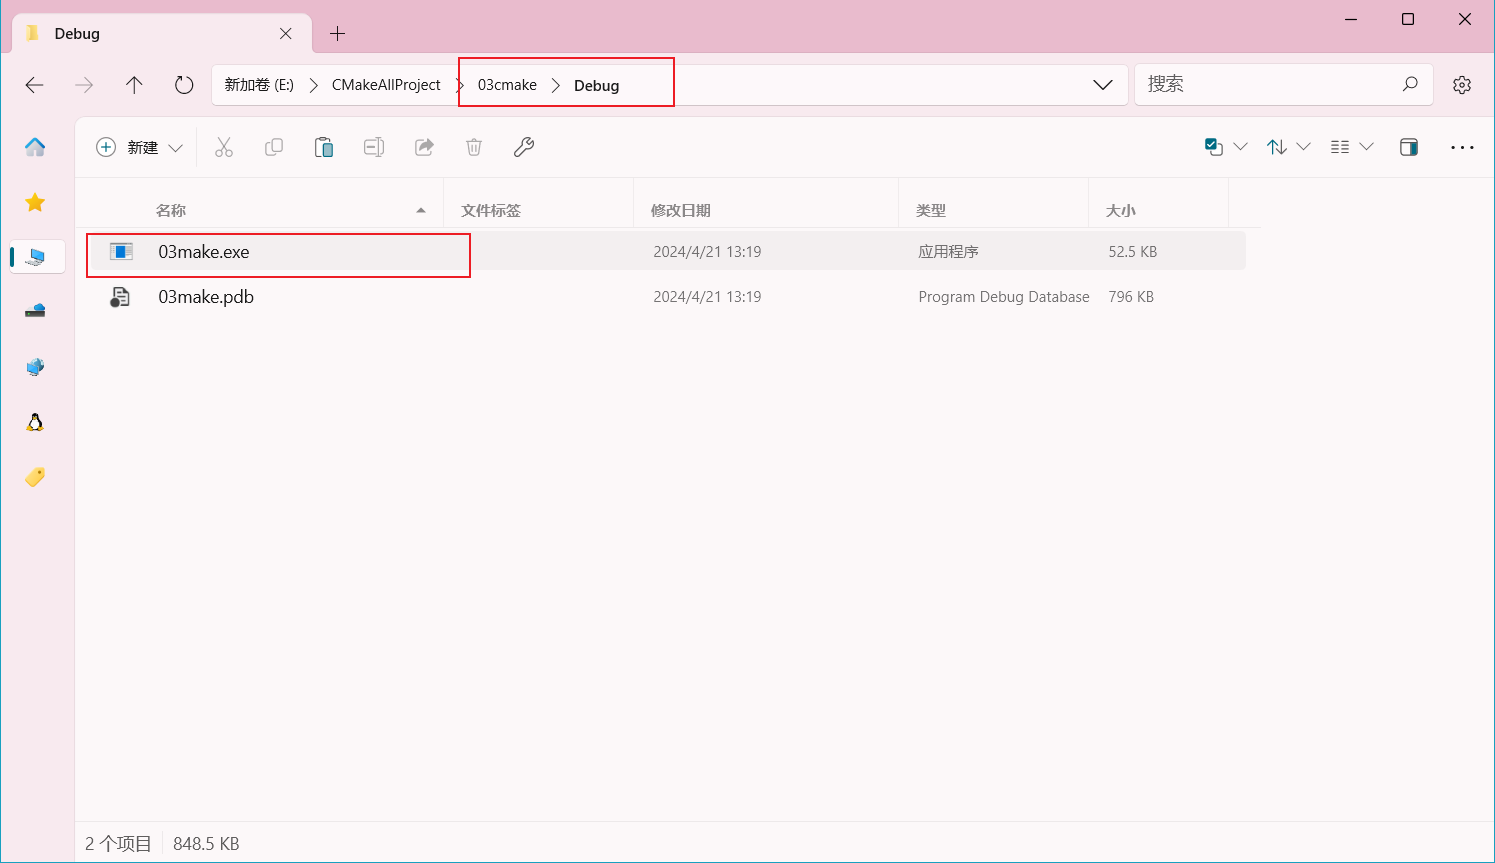
回到 Visual Studio ,将 03make 项目设为启动项目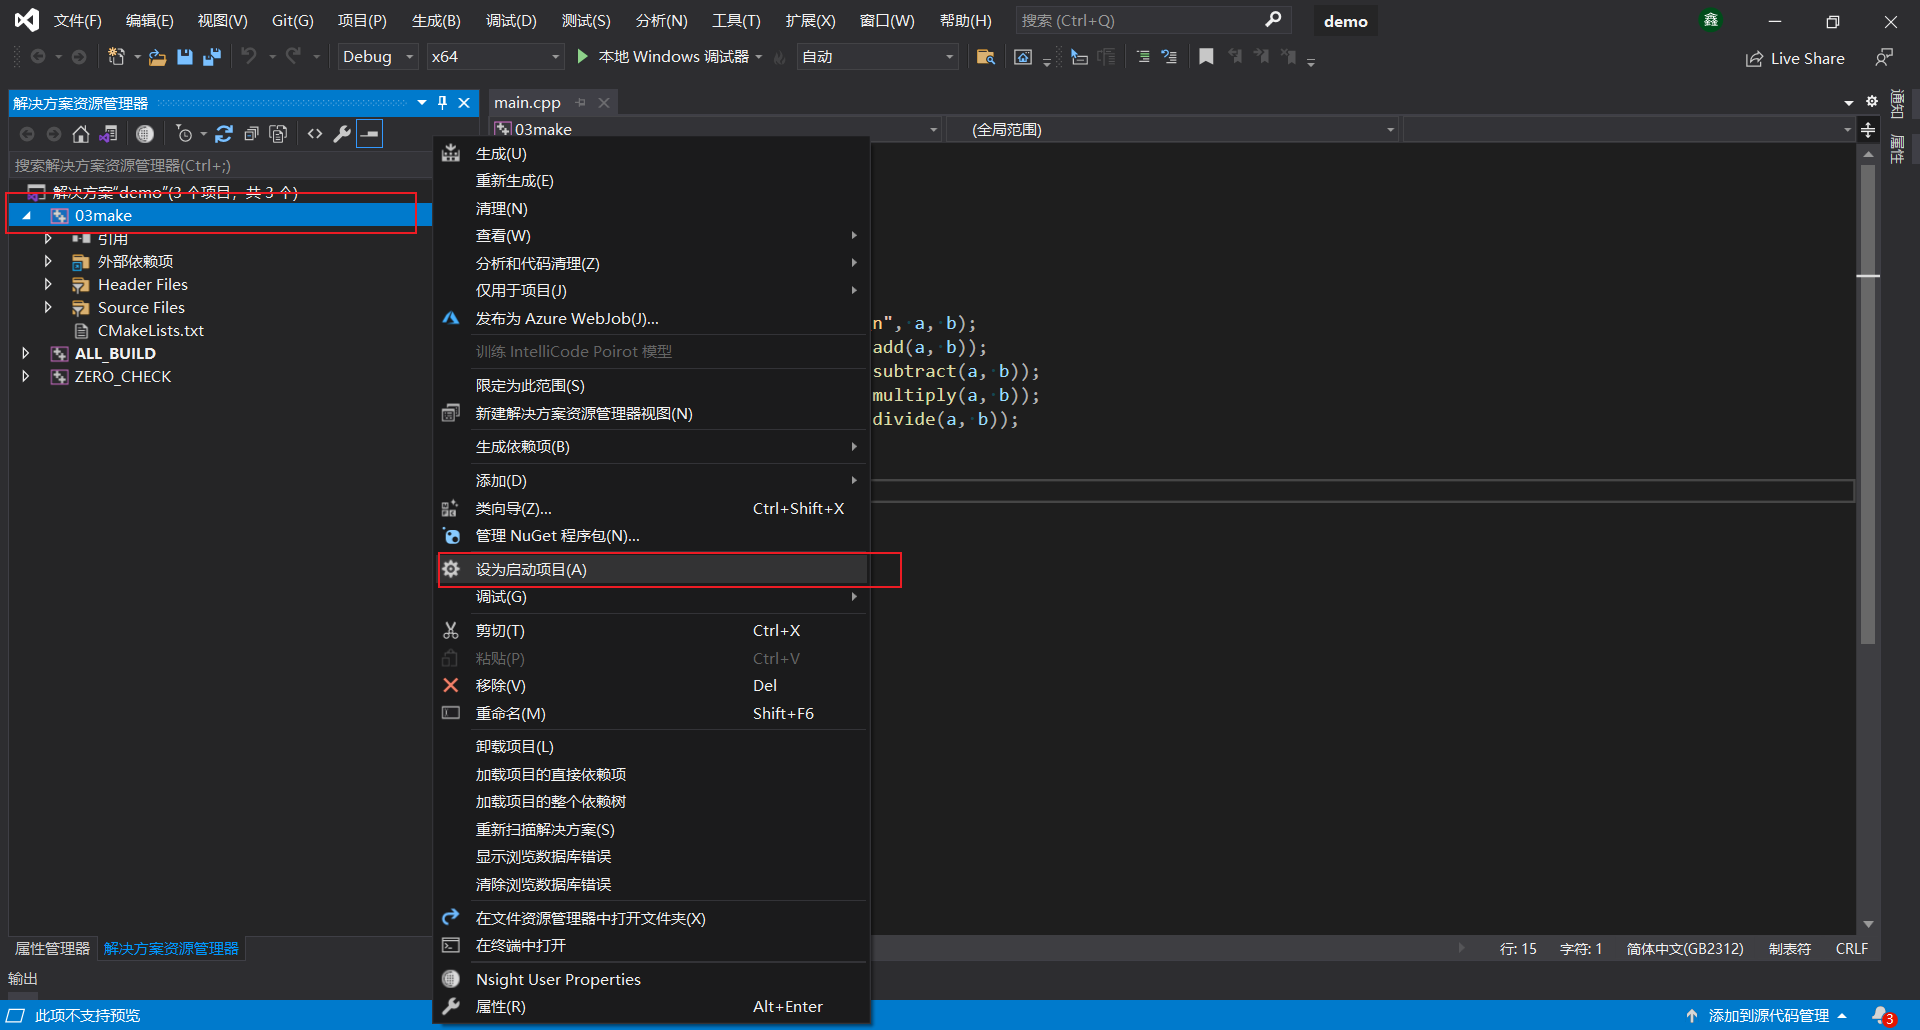
点击本地 Windows 调试器即可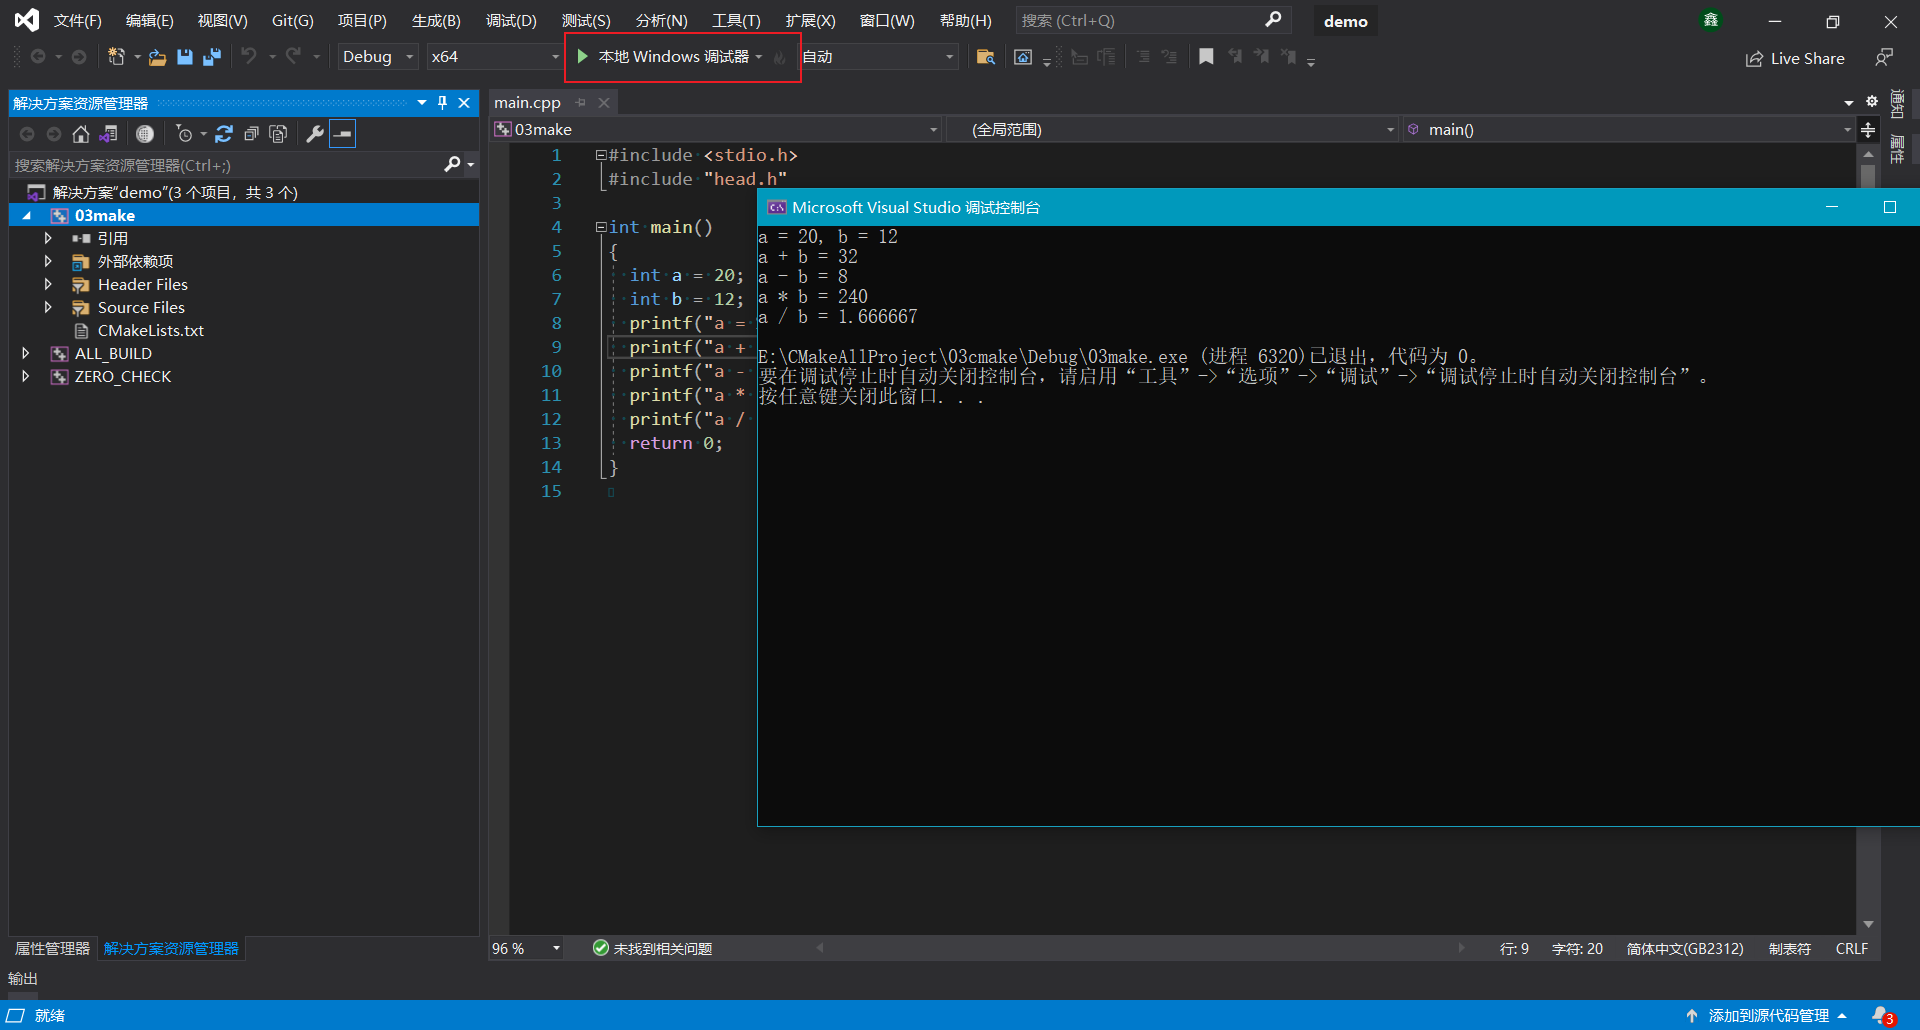
# 3.2 通过生成 makefiles 文件,再由 MinGW 编译而得
参考文章:http://t.csdnimg.cn/m9JqW
首先,先清理一下上面创建 vs 工程文件。由于之前使用直接在项目根目录使用 cmake 命令(即 cmake . ),因此所生成的 vs 工程文件,也会和原先的代码杂糅在一起。所以,只能够手动删除,保留源码和 CMakeLists.txt 。
至于如何高效的删除,请阅读这篇文章如何优雅的删除 Cmake 生成的文件?
以下是删除后的项目结构
03cmake | |
├─ .vscode | |
│ ├─ c_cpp_properties.json | |
│ └─ tasks.json | |
├─ add.cpp | |
├─ CMakeLists.txt | |
├─ div.cpp | |
├─ head.h | |
├─ main.cpp | |
├─ mult.cpp | |
├─ README.md | |
└─ sub.cpp |
在项目根目录输入以下命令
cmake -S ./ -B ./ -G "MinGW Makefiles" |
使用该命令可以直接生成 makefiles 文件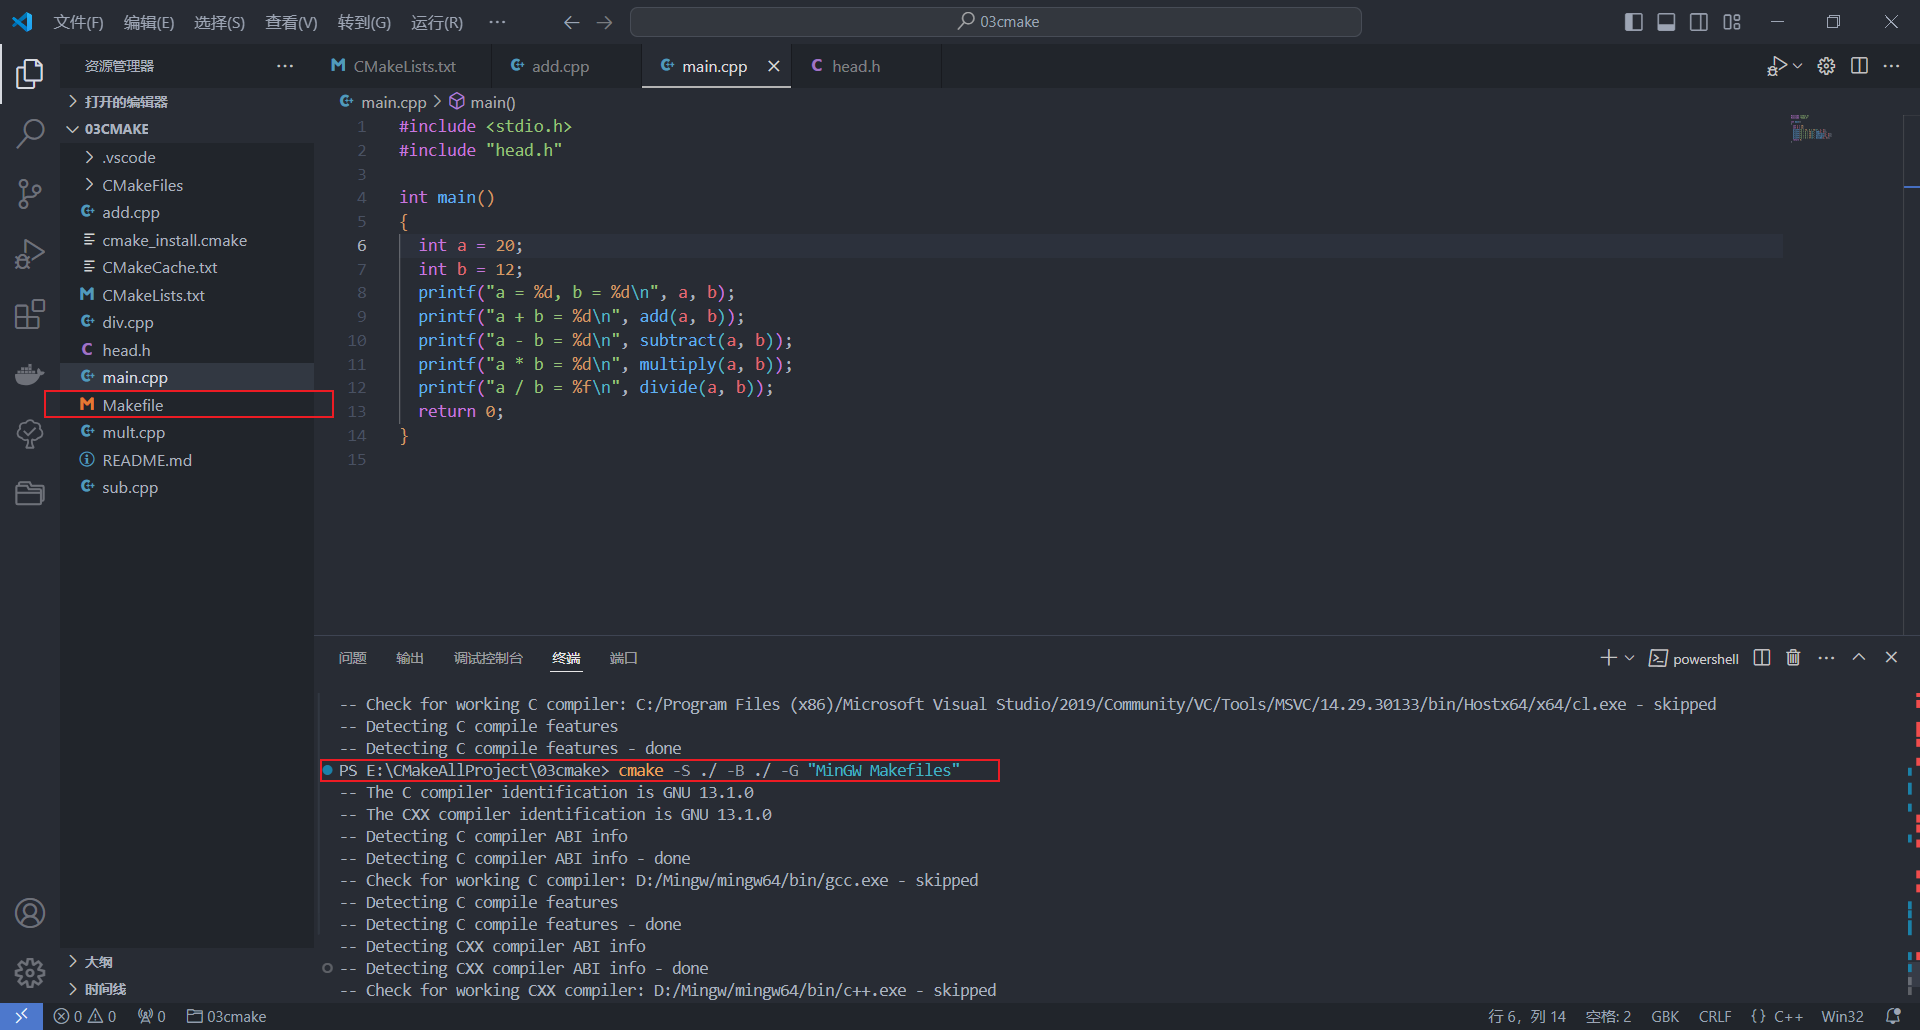
然后可以通过以下命令,在项目根目录中调用 MinGW 里面中 mingw32-make.exe 程序编译生成。(这里我重命名为了 make.exe )
make |
即可在当前目录下,生成可执行文件 03make.exe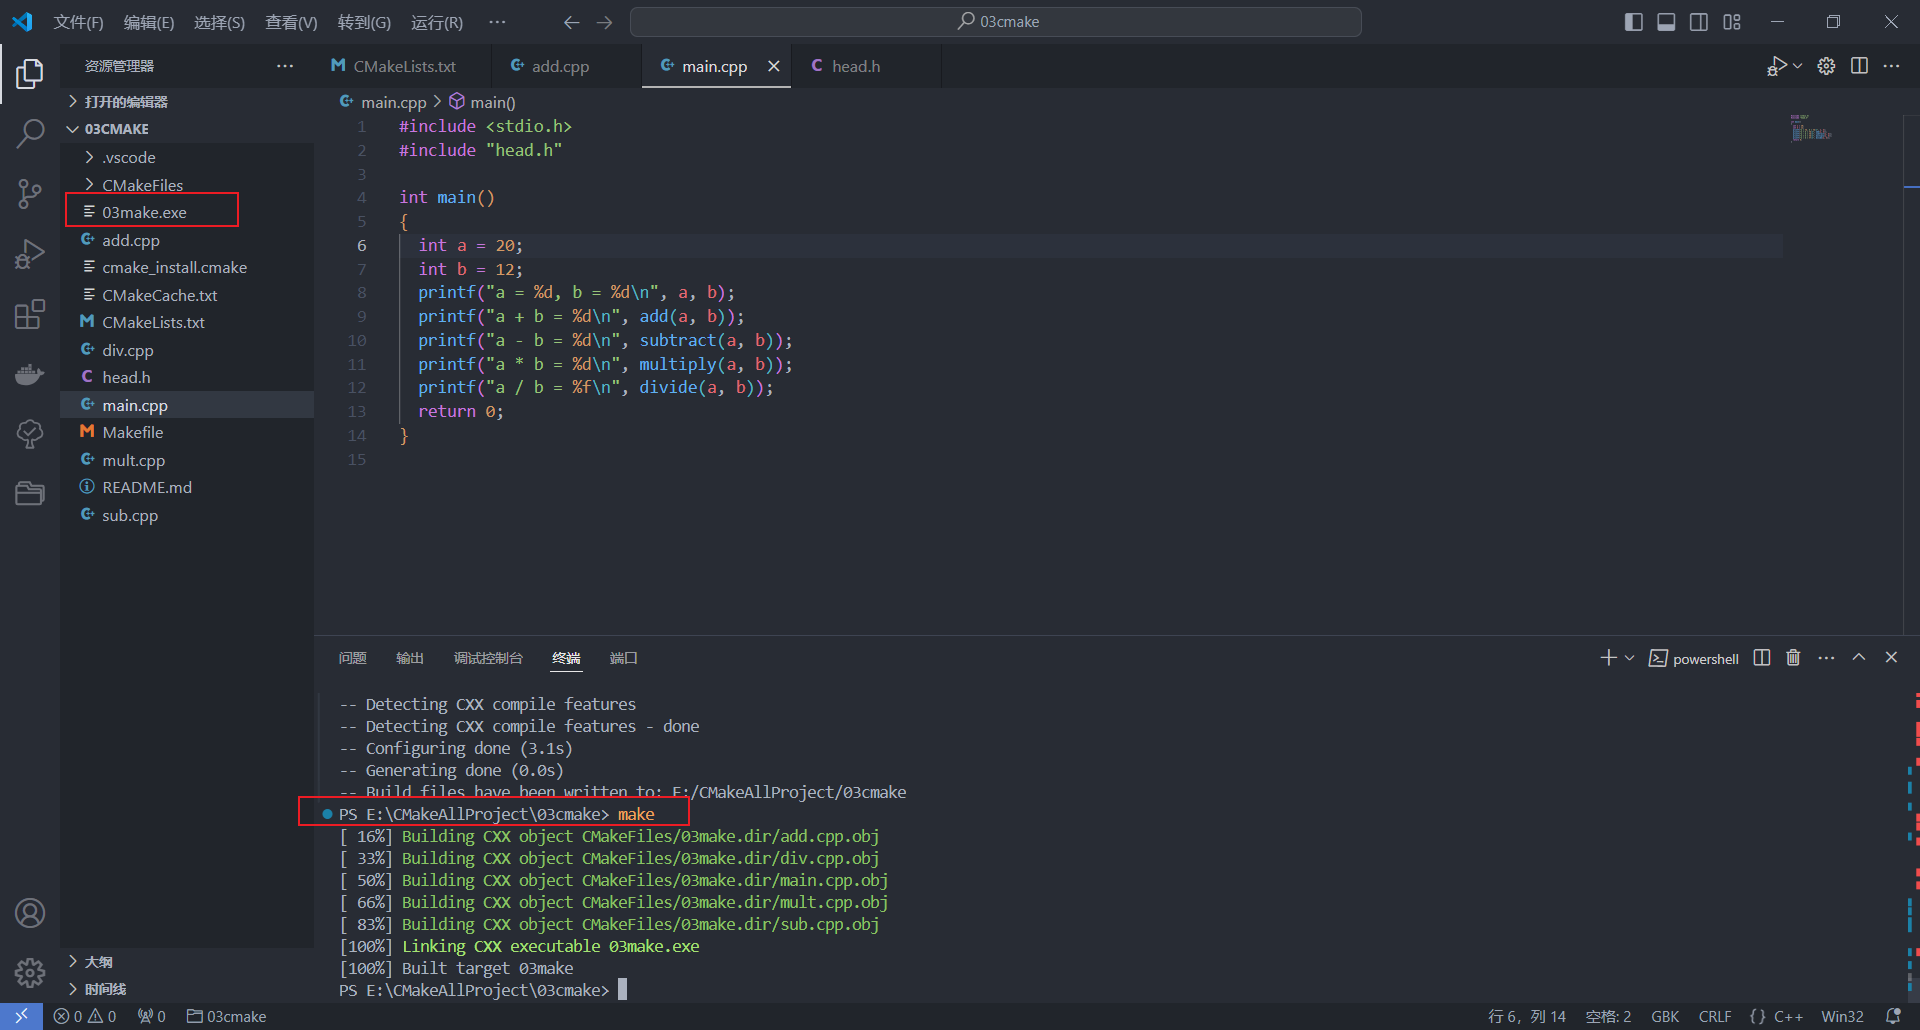
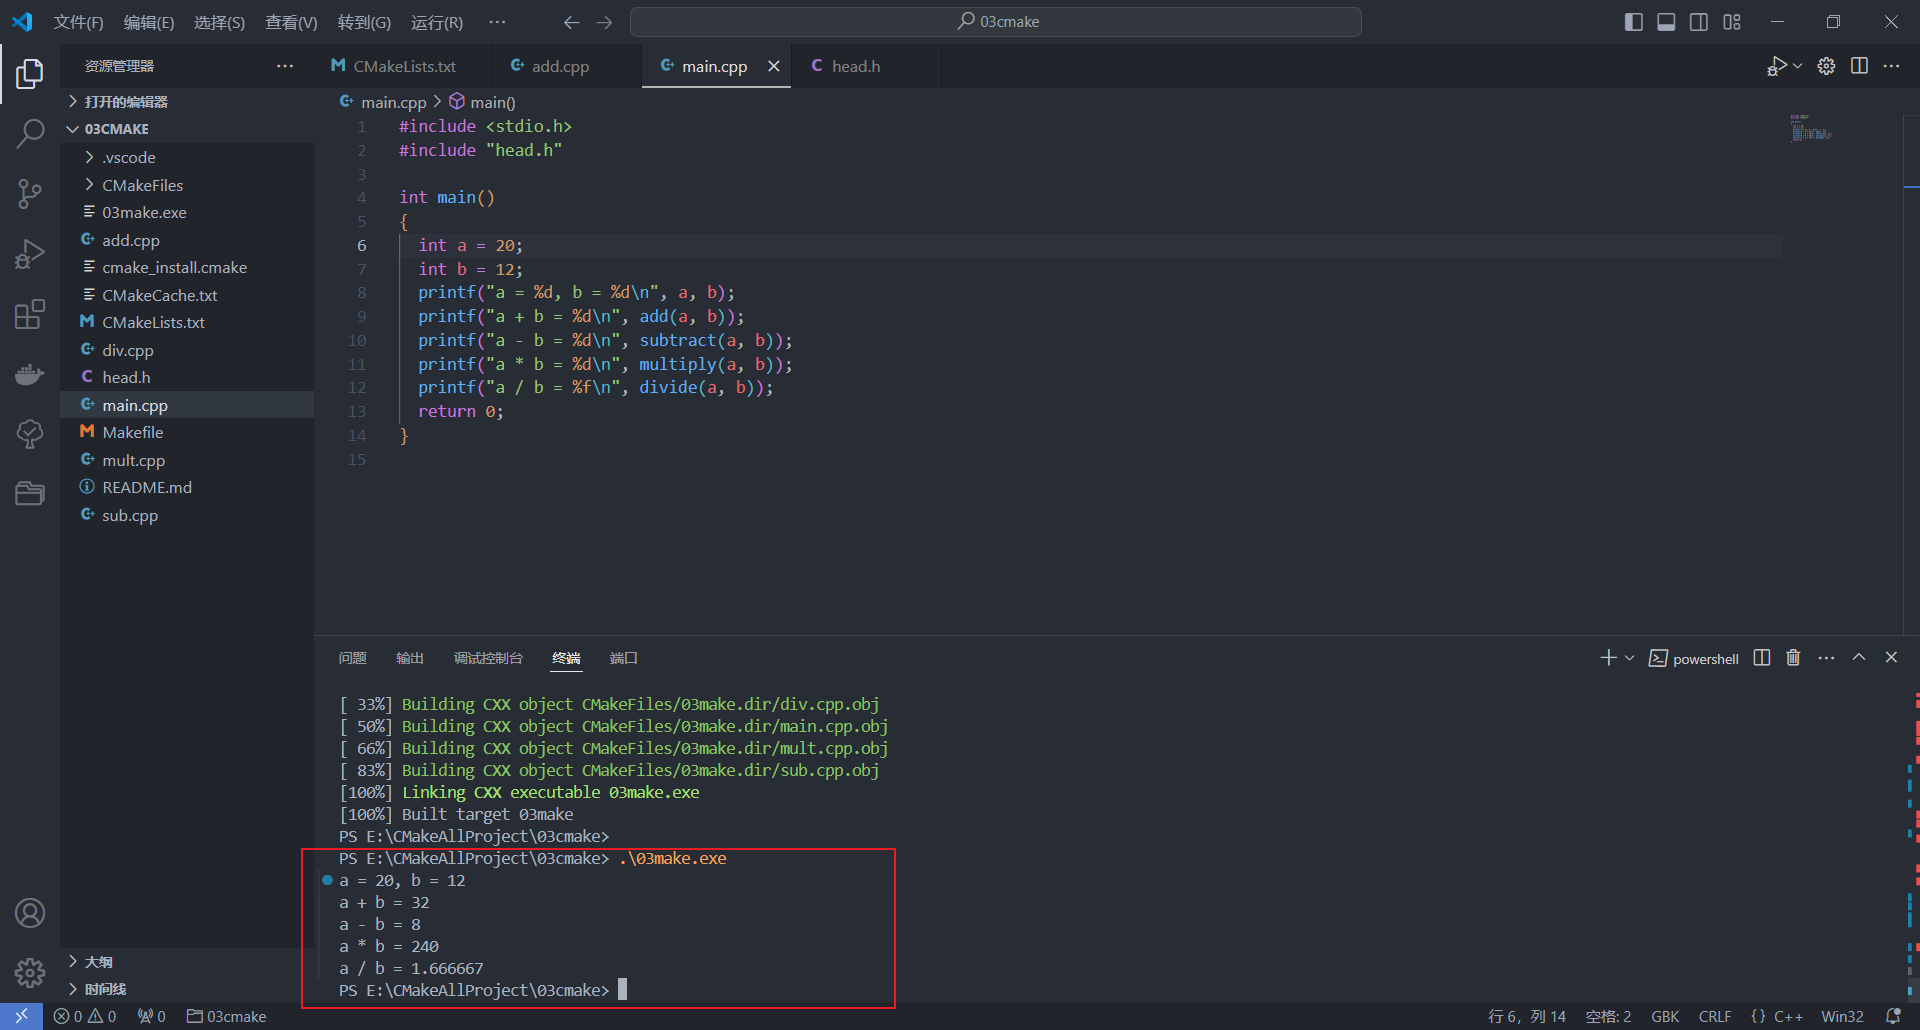
运行即可
.\03make.exe |
